Welding Methods For Excavator Adapter
Jan 02, 2026
Welding Methods for Excavator adapter
This is a very specific and important technical issue. Welding the excavator tooth seat (also called adapter) is a typical high-strength steel, thick-plate structure welding process, requiring extremely high precision and directly affecting the excavator's service life and operational safety.

I. Core Principles
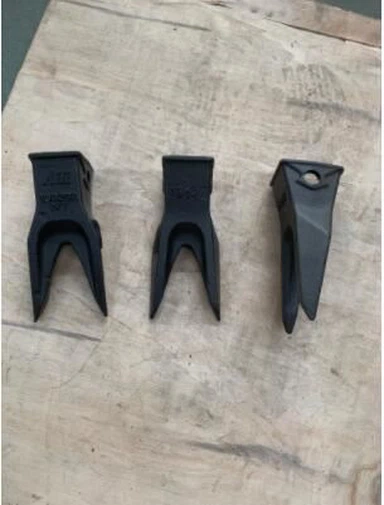
The adapter and bucket wall are usually made of high-strength wear-resistant steel or medium-high carbon steel, which has poor weldability and is sensitive to heat input.
Strength Matching: High-strength, low-hydrogen welding materials must be used.
Crack Prevention: The key is preheating, controlling the interlayer temperature, and slow cooling after welding to prevent cold cracking and hydrogen-induced cracking.
II. Pre-Welding Preparations (Crucial)
Ensure the excavator is parked stably and the bucket is reliably secured.
Clear flammable materials from the site and wear appropriate protective equipment (face mask, gloves, fireproof clothing, etc.). Thorough Cleaning: Use an angle grinder, wire brush, or carbon arc gouging to completely remove rust, oil, paint, old weld slag, and dirt from the weld area and at least 20mm around it until the metal shines through. This is crucial to prevent porosity and cracking.
Beveling Preparation: If replacing an old toothed plate, thoroughly grind away any remaining old weld seams.
A proper assembly clearance (usually 1-3mm) should be left between the new toothed plate and the plate wall, and a beveling (usually a single-sided V-shape or U-shape) should be made according to the plate thickness to ensure full penetration. The beveling angle is generally between 30° and 45°.
Preheating: This is a mandatory step! For high-strength wear-resistant steel, the preheating temperature is typically between 150°C and 250°C.
The specific temperature needs to be determined based on the material grade and thickness (refer to the material handbook). For example, Hardox 450 (40mm thick) typically requires a preheating temperature of approximately 150°C.
Method: Use a flame torch or heating blanket to evenly heat an area of at least 100mm on both sides of the weld center.
Measurement: Use a spot thermometer or temperature pen to measure the temperature at the root of the bevel to ensure the specified temperature is reached.
III. Selection of Welding Materials and Equipment
Welding Material Selection:
Preferred: Low-hydrogen flux-cored welding wire (e.g., E71T-1CJH4, conforming to AWS standards), using gas shielded welding. This is currently the most common and efficient method.
Alternatively: Low-hydrogen welding electrodes (e.g., national standard electrodes with strength matching J607, J707, etc., or E7018/AWS standard). Suitable for locations where gas shielded welding is difficult or for small-scale repairs.
Critical: Welding materials must be dried! Welding electrodes must be strictly baked according to the instructions (e.g., baked at 350°C for 1 hour), and used immediately afterward, placed in an insulated container. Welding wire must be kept dry.
IV. Welding Process Control
Tack Welding: Before the formal welding, perform several strong tack welds at both ends and in the middle of the gear seat using the same process as the formal welding, approximately 20-30mm in length.
Tack welds also require preheating and cleaning.
Multi-layer, multi-pass welding: Never fill the bevel all at once! Multi-layer, multi-pass welding is mandatory.
Weld the root pass first to ensure good root fusion.
Carefully clean slag and spatter from each subsequent pass (especially when using welding rods).
Control the interpass temperature (interpass temperature), generally not exceeding 250°C. If the temperature is too high, pause and allow it to cool to the preheating temperature before continuing welding.
Welding Sequence: For longer welds, use a segmented back-welding method or a symmetrical skip-welding method to distribute heat and reduce deformation and stress concentration.
Weld from the middle towards both ends, or weld symmetrically from left to right.
Caution: Deformation:
Welding the adapter can easily cause localized deformation of the bucket wall plate. Minimize this through a reasonable welding sequence and fixture fixation. V. Post-Weld Treatment
Post-Weld Slow Cooling:
Immediately after welding, tightly wrap the welded area with insulating cotton (such as asbestos blankets) to allow it to cool slowly to room temperature. This is a crucial step in releasing stress and preventing delayed cracking.
Forced cooling with water or compressed air is absolutely prohibited.
Post-Heat Treatment (Optional but Recommended):
For particularly thick or extremely rigid structures, or welding in extremely cold environments, hydrogen removal treatment can be performed: Immediately after welding, heat the weld area to 200-250°C, hold at that temperature for 2-4 hours, and then cool slowly.
Weld Inspection: After cooling to room temperature, clean away weld spatter.
Visual Inspection: Check for surface porosity, undercut, crater cracks, etc.
Installation and Testing: Install the bucket teeth and check for smooth fit, confirming that the weld is free of abnormalities.
Summary and Warnings
Consequences of Poor Welding Processes: Incorrect welding can lead to cracks in the weld or heat-affected zone. Under heavy impact, these cracks can propagate rapidly, causing the entire gear housing to tear and detach, resulting in serious safety accidents and greater economic losses.
No preheating, inadequate cleaning, and the use of ordinary welding rods are the three most common causes of welding failures.
If you are not an experienced professional welder, it is strongly recommended that the welding of such critical structural components be outsourced to qualified professionals or specialized repair shops.
Safe and standardized welding processes are fundamental to ensuring equipment lifespan and operator safety.